Google Tag Manager
In order to update fragments to your websites code easily we recommend you use a tag management system which will enable you the ability to update pixel code and tracking tools more seamlessly than updating the website codebase.
Google Tag manager is a well known tool that once installed on all domains will enable you to place code relating to the Meta Pixel, Google Adwords, Google Analytics and floodlight tags. It is critical that if you are using a third party booking engine to capture purchases that cross domain tracking is enabled to capture those events.
WIthin GTM you can create data layer variables that will enable you to capture information on revenue and currency on certain events of your website. *advanced
Installing a Tag Manager container is relatively straight forward and instructions can be found here
Instructions for installing the same pixel and conversion label using the raw script broken down by Facebook and Google Display
Facebook
Pageview event – to be placed on all pages of the site
Purchase event – to be triggered on purchase of the product
Please again be mindful for references to the data layer variables in the purchase event.
Typical instructions to install the pixel code
Please note the script is for illustration purposes and not to be used for live activity.
1. Sign into your Google Tag Manager account.
2. Choose your account and go to ‘Tags’ on the left-hand side of the page. Then, click ‘New’ in the top- right of the page.
3. Go to ‘Tag configuration’ and scroll down to ‘Custom HTML’
4. Paste the tracking pixel code
5. *Only for Purchase code: Please enter your data layer variable and the relevant currency into the tracking pixel, this is highlighted in the code below
6. For page view pixel code set to all pages, for purchase set to trigger on purchase confirmation pages.
7. Label your tag in the top-left of the screen, then click ‘Save’.
8. Hit ‘Publish’.
9. Please confirm an example of a booking URL, indicating the phrase that will help us identify that there has been a conversion (for example, if the URL has a slug term that always has ‘thank-you’ or ‘confirmation’ in it). It is then advised an Ink admin does a test booking to ensure the pixel is firing.
Example Facebook/Meta Pixel Code
Page View
<!-- Facebook Pixel Code -->
<script>
!function(f,b,e,v,n,t,s)
{if(f.fbq)return;n=f.fbq=function(){n.callMethod?
n.callMethod.apply(n,arguments):n.queue.push(arguments)};
if(!f._fbq)f._fbq=n;n.push=n;n.loaded=!0;n.version='2.0';
n.queue=[];t=b.createElement(e);t.async=!0;
t.src=v;s=b.getElementsByTagName(e)[0];
s.parentNode.insertBefore(t,s)}(window, document,'script',
'https://connect.facebook.net/en_US/fbevents.js');
fbq('init', ‘{{Facebook Pixel ID}}’);
fbq('track', 'PageView');
</script>
<noscript><img height="1" width="1" style="display:none"
src=https://www.facebook.com/tr?id={{Facebook Pixel ID}}[AS2] &ev=PageView&noscript=1
/></noscript>
<!-- End Facebook Pixel Code -->
Purchase
<!-- Facebook Pixel Code -->
<script>
!function(f,b,e,v,n,t,s){if(f.fbq)return;n=f.fbq=function(){n.callMethod?
n.callMethod.apply(n,arguments):n.queue.push(arguments)};if(!f._fbq)f._fbq=n;
n.push=n;n.loaded=!0;n.version='2.0';n.queue=[];t=b.createElement(e);t.async=!0;
t.src=v;s=b.getElementsByTagName(e)[0];s.parentNode.insertBefore(t,s)}(window,
document,'script','https://connect.facebook.net/en_US/fbevents.js');
fbq('init', ‘{{Facebook[AS3] Pixel ID}}’);
fbq('track', 'Purchase',{
value: '{{Insert_Amount_Here}}',
currency: '{{Insert_Currency}}',
});
</script>
<noscript><img height="1" width="1" style="display:none"
src=https://www.facebook.com/tr?id={{Facebook Pixel ID}}&ev=PageView&noscript=1
/></noscript>
<!-- End Facebook Pixel Code -->
More guidance can be found on Meta's website
Google Ads Conversion Label
If you can install the following tag with these instructions. We can provide the conversion linker to install via GTM if preferred.
Global site tag– to be placed on all pages of the site within the <head></head> sections.
Event snippet (purchase) – to be triggered on purchase of the product. Paste code in between the <head></head> tags of the page(s) that you'd like to track, right after the global site tag. Please add in the data layer variables associated to revenue and currency.
Google Tag
Page View
<!-- Global site tag (gtag.js) - Google Ads: {{Google Ads Account}}-->
<script async src="https://www.googletagmanager.com/gtag/js?id=AW-{{Google Ads ID}}"></script>
<script>
window.dataLayer = window.dataLayer || [];
function gtag(){dataLayer.push(arguments);}
gtag('js', new Date())
gtag('config', 'AW-{{Google Ads ID}});
</script>
Purchase
<!-- Event snippet for Purchase conversion page -->
<script>
gtag('event', 'conversion', {
'send_to': 'AW-{{Google Ads ID}}/{{ID}},
'value': ‘{{insert_amount_here}}[AS6] ’,
'currency': ‘{{insert_currency_here}}’,
'transaction_id': ''
});
</script>
Here is some a journal on how to install these tags and test
Setting up Google Analytics in Google Tag Manager
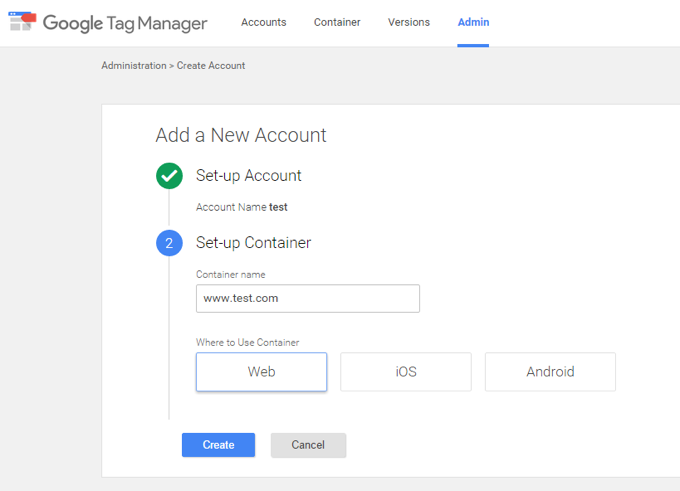
1. Create your Google Tag Manager Container
Sign up using this link https://tagmanager.google.com
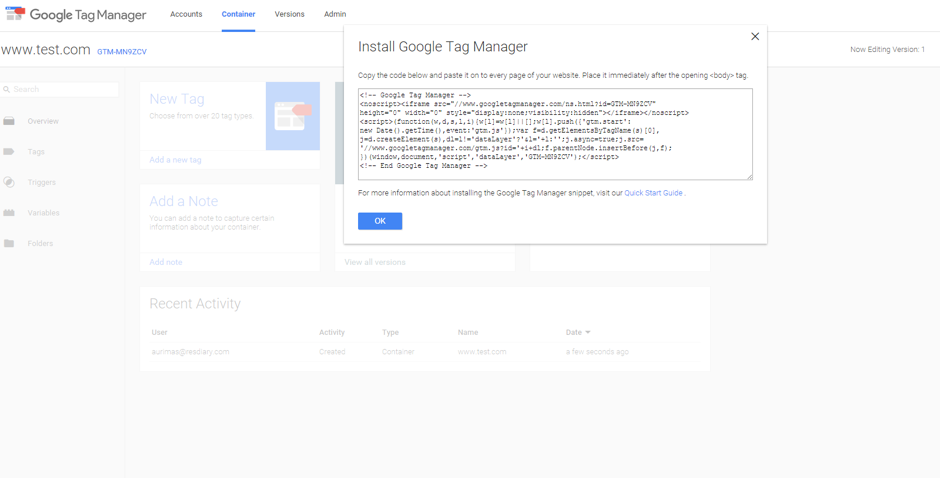
After the sign up you will receive your GTM code, click OK
.
At the top navigation panel, you'll see your GTM-XXXXXX container number.
2. How to add Google Analytics Tracking into GTM?
In the Tag Manager, go to your container.
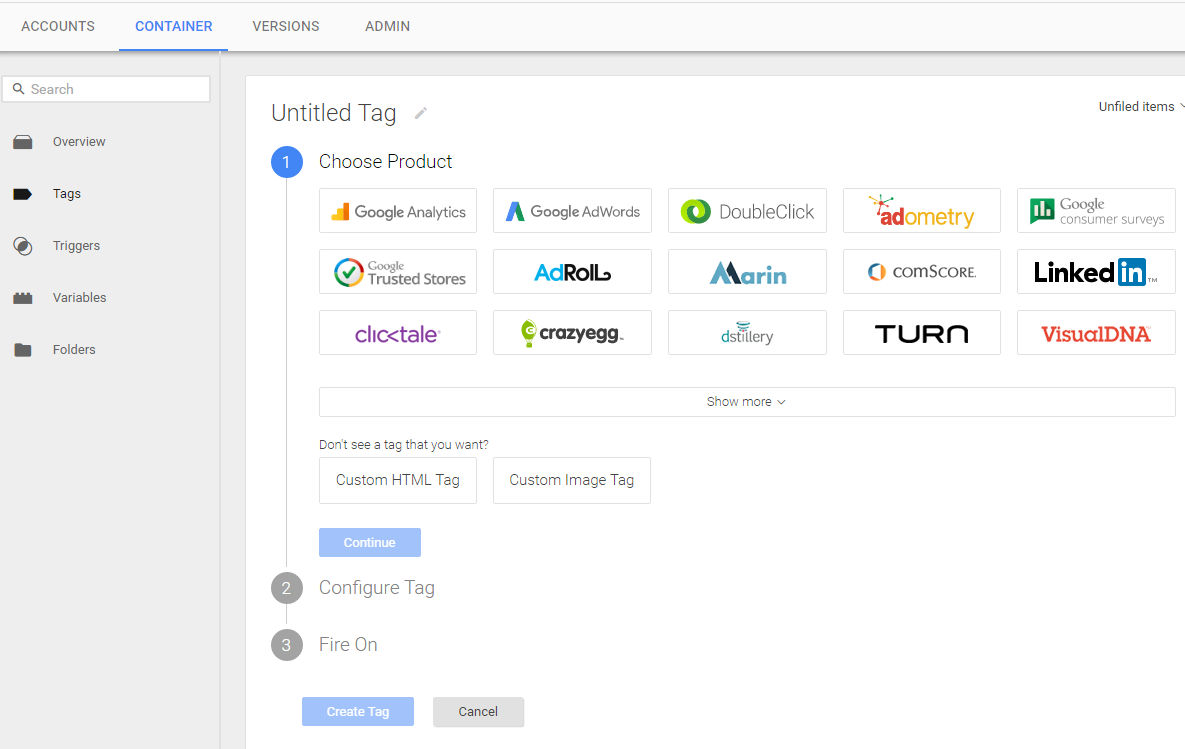
Navigate to Tags section.
Click New
Start by naming your tag any way you want.
Select Google Analytics
Select Universal Analytics and click continue.
It will ask you to input your Tracking ID.
To get your Tracking ID, go to analytics.google.com -> select the account you want to track -> Admin -> Tracking Info -> Tracking Code.
Copy the UA-XXXXXX-XX code and paste it into Tag Manager Tracking ID field.
Click continue.
Select All Pages.
Click Create tag.
Make sure you click Publish at the top right side in order for these changes to take effect.
If you have done everything correctly, all the pageview data should be going to Google Analytics.
More information about setting up Google Analytics can be found in our page here


